Shop all the links to my beautiful office sanctuary here
Affiliate Disclosure: Some of the links in this post are affiliate links, which means I may earn a commission if you click on them and make a purchase. This comes at no extra cost to you. Your support through these links helps me continue to create content for you. Thank you!
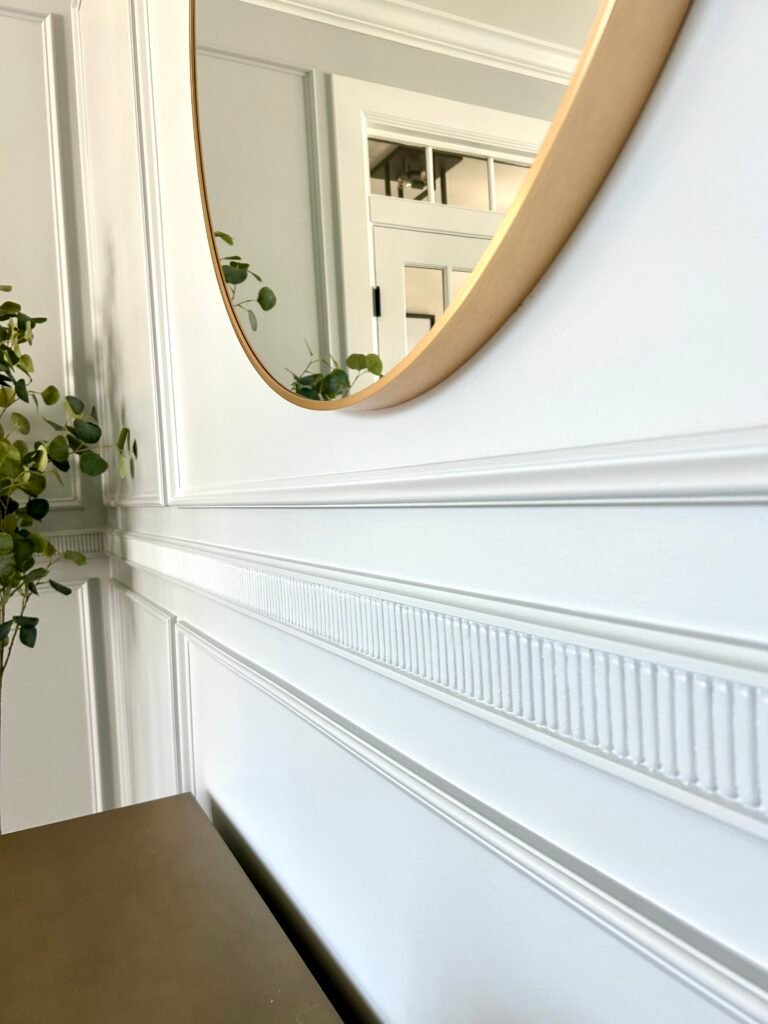
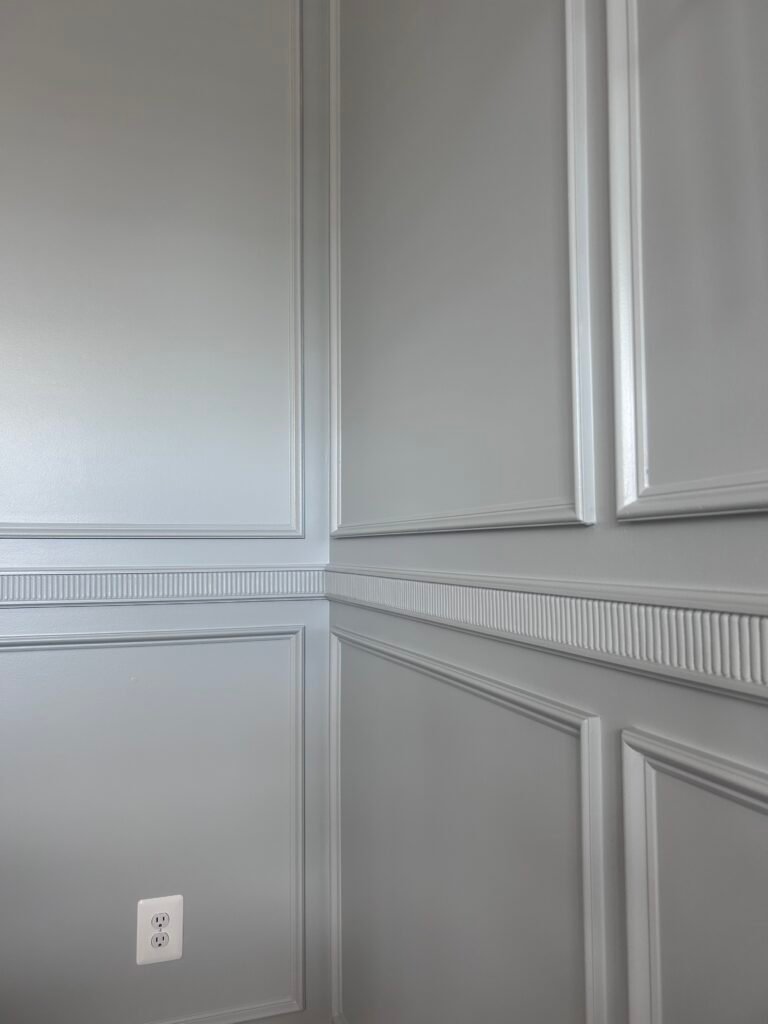
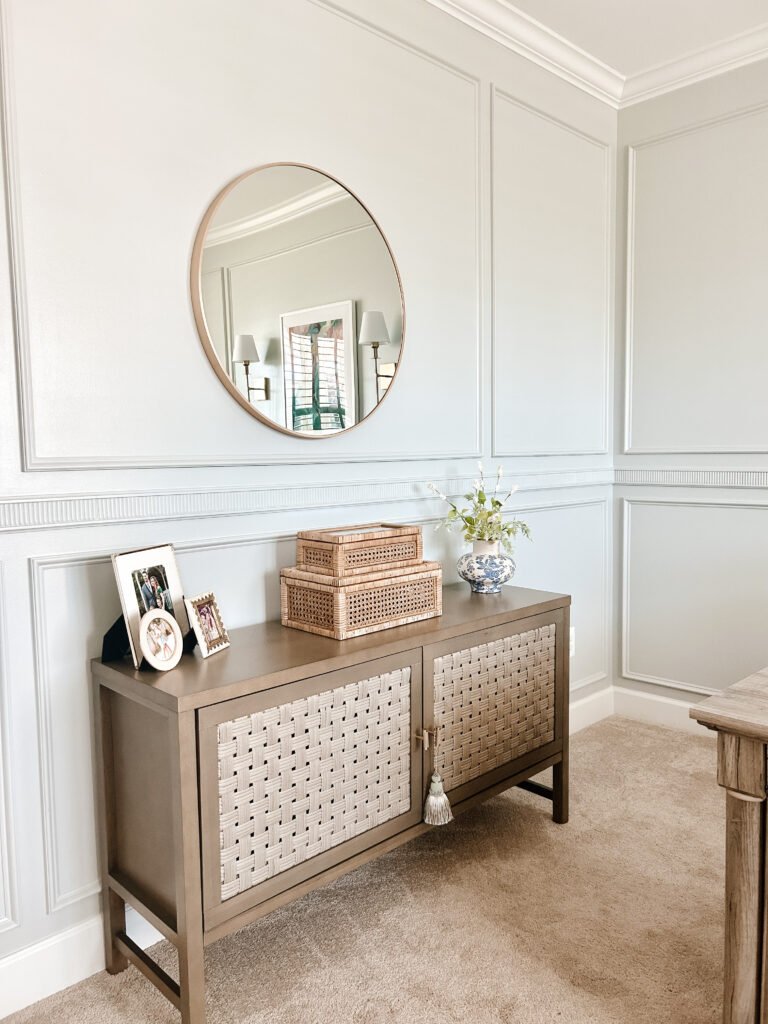
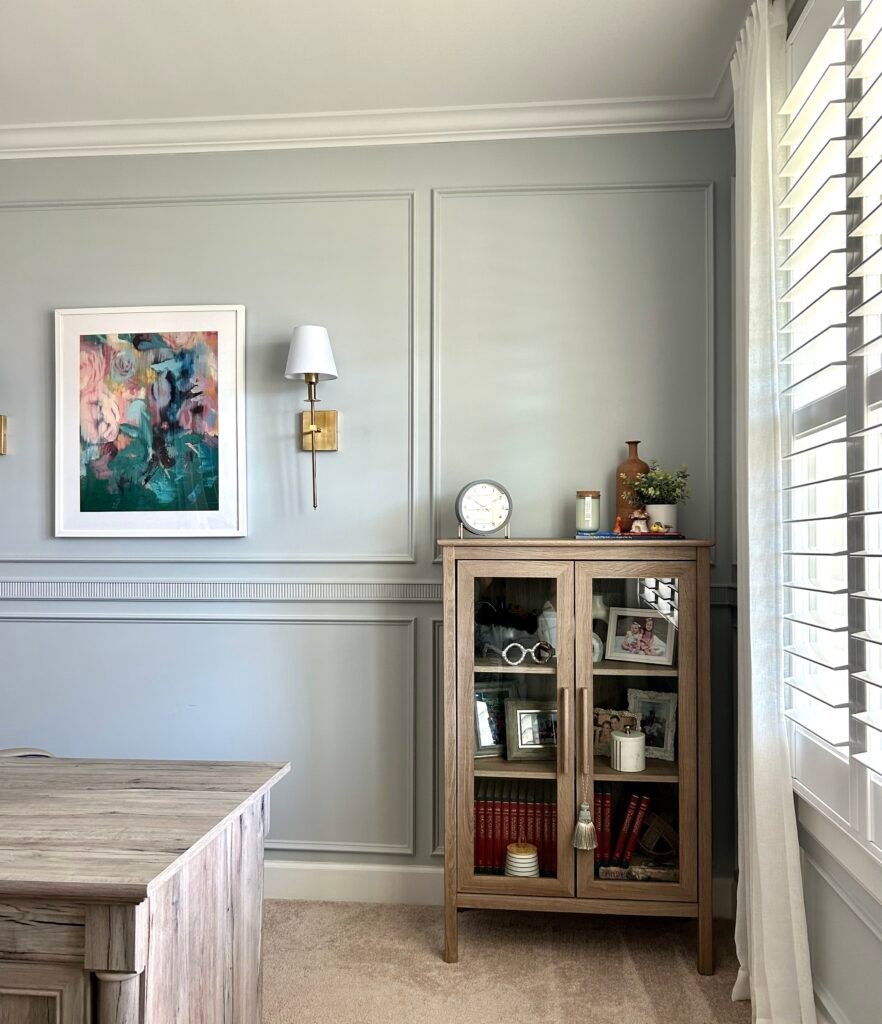
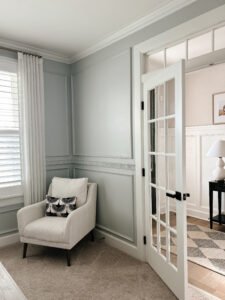
Giving my office a makeover was one of the most satisfying DIY projects I’ve taken on. I wanted a space that felt elevated and sophisticated but still reflected my personality. The key to achieving this look was using decorative box molding paired with a fluted chair rail, shop it here, between the upper and lower boxes. The addition of the chair rail took the design from standard trim boxes to something super remarkable, more than ordinary, more than basic, and more than expected.
If you’ve been thinking about tackling a similar project, I’ll walk you through my process step by step, including some of my best tips and tricks to get a flawless finish.
Why Decorative Box Molding?
Decorative box molding is a classic architectural feature that adds depth and sophistication to any room. Unlike traditional wainscoting or beadboard, box molding provides a tailored, high-end look that can be customized to fit any style. By pairing it with a fluted chair rail, I was able to create a custom design that felt timeless yet fresh.
Beyond aesthetics, this type of wall treatment adds character, dimension, and value to a space. It’s an excellent way to transform a plain room into something that looks designer-made without the designer price tag.
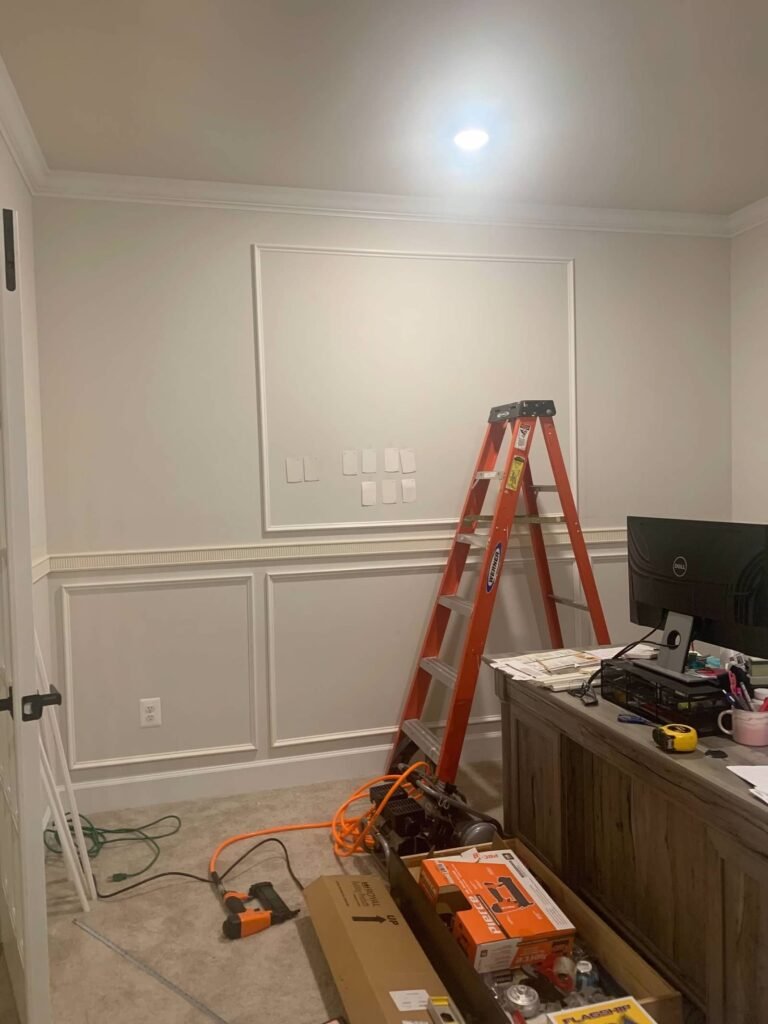
Planning and Measuring the Box Molding Layout
The first step in any trim work project is planning. I started by sketching out my design on paper, deciding how tall and wide I wanted each box to be on the wall. Start by measuring your entire wall and dividing it into thirds, this gives you a structured way to place your boxes. Factor in the width of your level when drawing these dimensions, as it plays a crucial role in spacing. Figuring out the size and number of boxes is where most people feel intimidated about starting the project, but here’s my best advice: Sit down with the expectation that this part will take longer than two minutes. You really need to concentrate. Once you embrace that, you’ll find that this step isn’t as overwhelming as it seems.
Taking a few extra minutes at this stage will save you from frustration later. With those expectations in mind, you will figure it out and I guarantee you’ll do it in less than 20 minutes!
But the real magic was how I transferred my design from the paper to the wall and how I measured and spaced out the molding. Instead of using expensive blue painter’s tape (which, let’s be honest, sounds like the cha-ching of money going down the drain) I opted for a three-foot level and a pencil. The width of the level became my consistent spacing guide for everything… the gaps between the boxes, the placement of the chair rail, and the top and bottom alignment of each section.
Here’s how I did it:
- I measured the entire wall and divided it into thirds before starting to create the boxes. Factoring in the width of the level, I adjusted my layout accordingly.
- I placed the level horizontally on the wall to create straight lines as guides for my molding.
- The top of the level created the line for the bottom of the chair rail.
- The bottom of the level created the line for the top of the lower wall box.
- When marking the vertical sides, the right side of the level became the left side of one box, and the left side of the level became the right side of the next box.
This simple trick gave me a perfect template for the entire room without needing extra tools or wasting materials.
Cutting and Installing the Trim
Once my layout was marked on the walls with all the measurement’s, it was time to cut and install the trim. The best part? This was much easier than it might seem.
Cutting the Trim:
- Chair Rail – I used a chop saw (miter saw) to cut 45-degree angles for the corners.
- Box Molding – Instead of hauling out the miter saw for every cut, I used miter shears., shop them here These made it incredibly simple and efficient to cut all my trim pieces without having to constantly turn on and adjust a saw.
- Since the top and bottom trim pieces of each box were the same size, I batch-cut everything at once for a streamlined process.
Installation:
- Install the Chair Rail First – This was the foundation for the entire design. I nailed it into the studs wherever possible.
- Add the Box Molding – The trim pieces were installed next, aligning them with the level lines I had previously marked.
- Nailing Technique – I aimed to shoot nails into studs, but since that wasn’t always possible with decorative molding, I used a technique where I crisscrossed two nails in areas without studs for extra grip.
- Avoiding Swiss Cheese Walls – A common mistake is over-nailing. Instead, I used just enough nails to secure the molding without making my walls look like they’d been attacked by a nail gun.
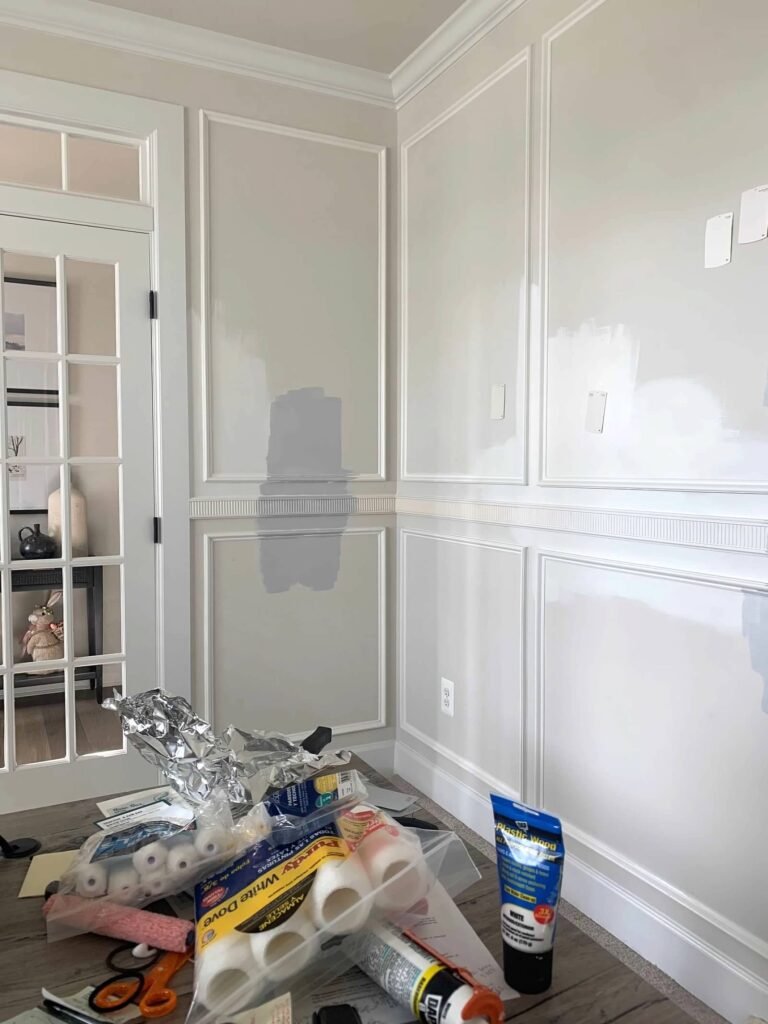
Prepping and Painting for a Flawless Finish
Once all the molding was up, it was time for the finishing touches that separate DIY projects from professional-looking results.
Filling and Caulking
- Fill nail holes with wood filler
- Caulk all seams where the trim meets the wall. This step is time-consuming but absolutely necessary for a polished look.
- Smooth out caulk lines with a wet wipe and your fingers
Paint Color: Silver Leaf by Valspar 4006-1A in satin sheen
Painting Tips
- If I could do this again, I would paint the walls first, then install the trim, and finally, paint the trim. This would have saved some time.
- I used a paintbrush and roller, but if you have access to a paint sprayer, I highly recommend it for a smooth, even finish.
- Since my office already had crown molding, it beautifully framed the entire design. If your room doesn’t have crown molding, don’t worry, this wall treatment is stunning on its own. But if you’re on the fence, think of crown molding as the final accessory, the earrings that complete the outfit.
Final Thoughts: Why This Makeover Was Worth It
This decorative box molding and fluted chair rail project completely transformed my office into a high-end, custom space that looks straight out of a designer’s portfolio. The fluted detail on the chair rail added elegance, texture, and a truly custom touch that set it apart from ordinary trim boxes.
Not only did this project improve the aesthetics of my space, but it also added architectural interest and increased the overall value of my home. If you’re considering a wall treatment makeover, I highly recommend giving this a try. With some careful planning, the right tools, and a little patience, you can achieve a luxurious look on a DIY budget.
So, are you ready to elevate your space with decorative molding? Grab your level, pencil, and miter shears and transform your walls like a pro!