How years of scribbles, memories and tiny hands became the most meaningful artwork in our home
Every January, without fail, I get this overwhelming urge to organize. It’s like a switch flips in my brain. New year, clean slate, let’s get our lives together energy. And every year, I convince myself that this is the year our house is going to feel calm, intentional, and clutter free. Spoiler alert. It never fully happens. But I try.
This year, that organizing bug led me straight into our spare closet. You know the one. The closet that becomes the catch all for literally everything you don’t know what to do with. Seasonal decor, old bins, random bags, things you swear you’ll “deal with later.” That closet.
As I started pulling things out, stacking bins, and mentally patting myself on the back for finally tackling it, I noticed something that stopped me in my tracks. Several plastic bins. All labeled “kids art.”
And suddenly, I wasn’t organizing anymore. I was standing there holding years of my children’s lives in my hands.
Inside those bins were drawings, paintings, school projects, scribbles, crafts, handprints, and creations spanning nearly a decade. Preschool. Kindergarten. First grade. All the way through now. My kids are eight and ten years old, which somehow feels impossible to say out loud.
And I remember thinking, What am I doing with this?
This artwork has been hidden in a dark closet for years. It’s piling up. It’s creating clutter. Am I really going to hide it for another twenty years? And then what? Hand it to my kids as adults who will probably feel guilty throwing it away but also have no idea what to do with it?
The truth hit me hard. This art isn’t for them. It’s for me. It’s for my memories. It’s for remembering who they were in those moments. The way their little hands moved across paper. The way they got lost in creating something just because it felt good.
So I asked myself a different question.
How do I honor this instead of hiding it?
Naturally, I did what we all do and went straight to Pinterest and Etsy. I started searching for ways other parents were turning their children’s artwork into something meaningful, and I quickly fell in love with these heirloom style canvases made from kids’ art using Mod Podge. They were stunning. Emotional. The kind of pieces that stop you in your tracks. And they were also wildly expensive, which at first made me gasp but later made complete sense.
I really took a deep dive into how these canvases were made and that’s when it clicked. Most of them started the same way. A child’s drawing would be taken apart. Maybe there was an adorable eight legged giraffe, a wonky sun, or a little stick figure family. Those elements were carefully cut out and Mod Podged onto a canvas. And honestly, it’s absolutely beautiful. I remember thinking, I can do this. I should do this.
Let me be clear. I was never the mom who saved every scribble. I didn’t keep every single piece of paper they brought home. But I did save the more intentional pieces. The ones that felt special. And yes, I also saved some purely because if I threw it out, my kids would notice and get upset. And also because I loved it. Because it held a memory.
The younger years, especially ages one to four, are hands down my favorite. It’s pure chaos. Scribbling. No rules. No expectations. Just color and movement and joy. There is something so magical about that stage. And while the artwork is “messy,” it’s the most honest kind of creativity there is.
As they’ve gotten older, their art has become cleaner. More intentional. More skilled. They draw better now. Their projects are thoughtful. And I love that too. But there is something about those early years that feels fleeting in a way you don’t understand until it’s gone.
I wanted all of it together. The evolution. The mess. The growth.
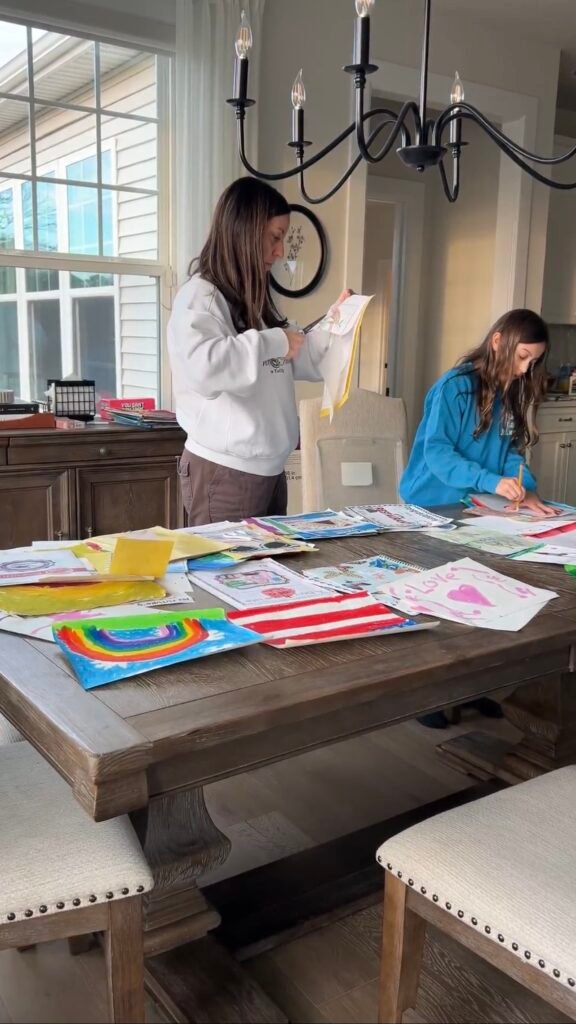
So, I got to work
Instead of cutting everything apart, I decided to use their larger pieces of artwork as the backdrop. Almost like wallpaper but used Mod Podge instead of wallpaper glue.
Then, I started cutting out all the intentional parts. The giraffes. The crooked suns. The tiny people. The crazy little animals that only make sense when your child explains them to you. And as I did that, I noticed what was left behind. The scribbly grass. The messy backgrounds. The accidental marks. The parts that didn’t feel “important enough” to make the cut. I put those pieces back in the bin. You could throw them away. And that’s when I stopped.
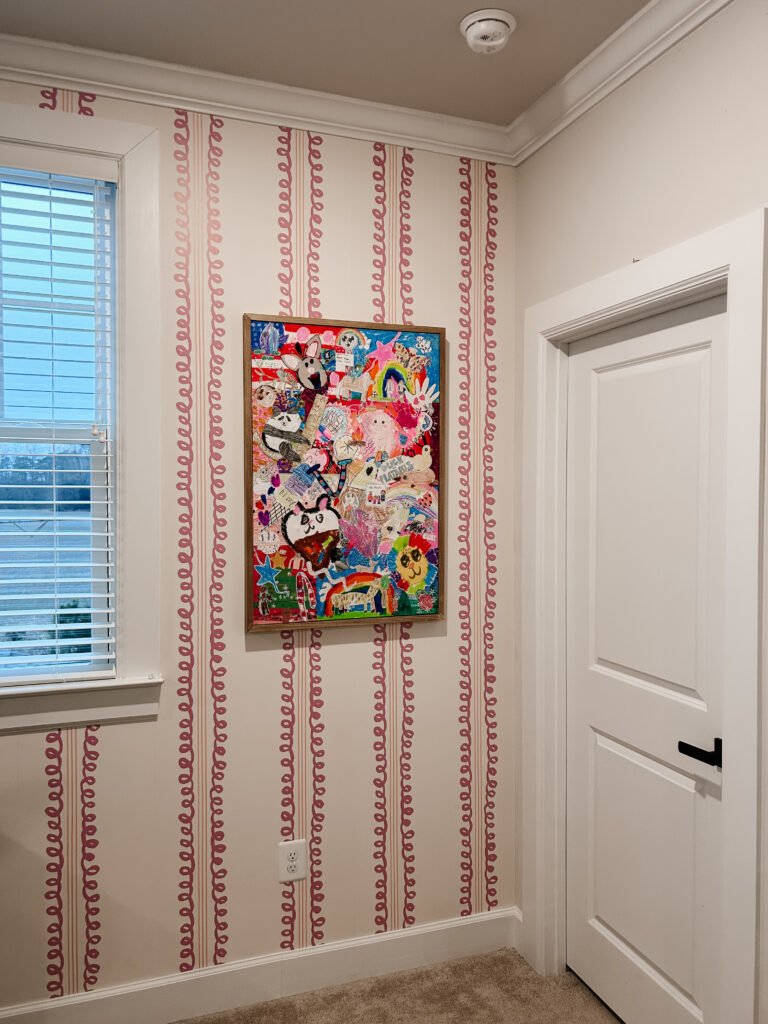
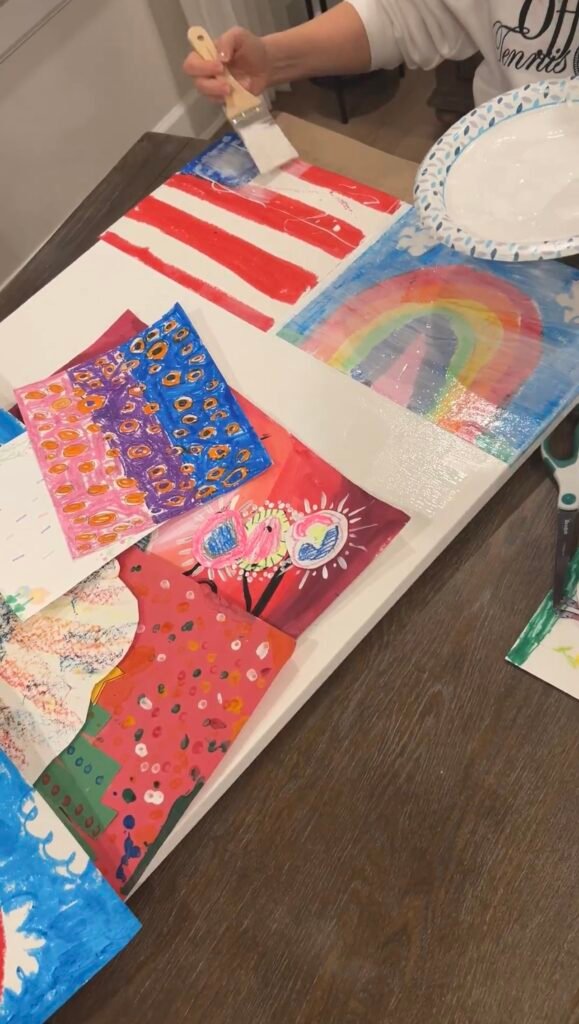
I started with a large 24 x 36 canvas here. I laid it flat and began applying a layer of Mod Podge here. Then I took a big piece of their artwork and placed it down as the base layer. I smoothed it out, added Mod Podge over the top, and let it seal. I repeated this over the entire canvas, overlapping pieces slightly, letting colors and patterns blend together.
It became this incredible layered background full of history.
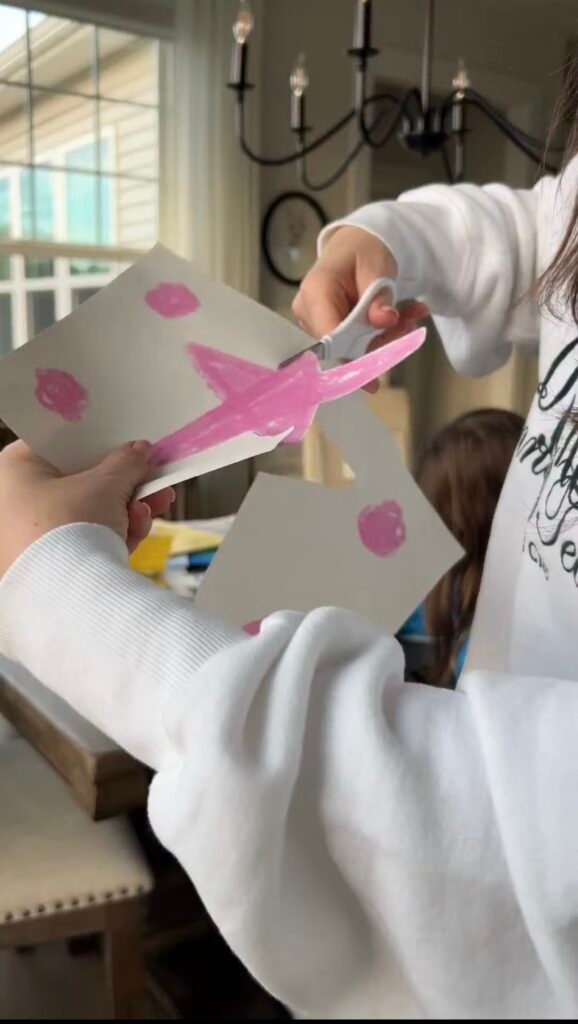
There’s a lot of pressure in cutting heirloom pieces like this
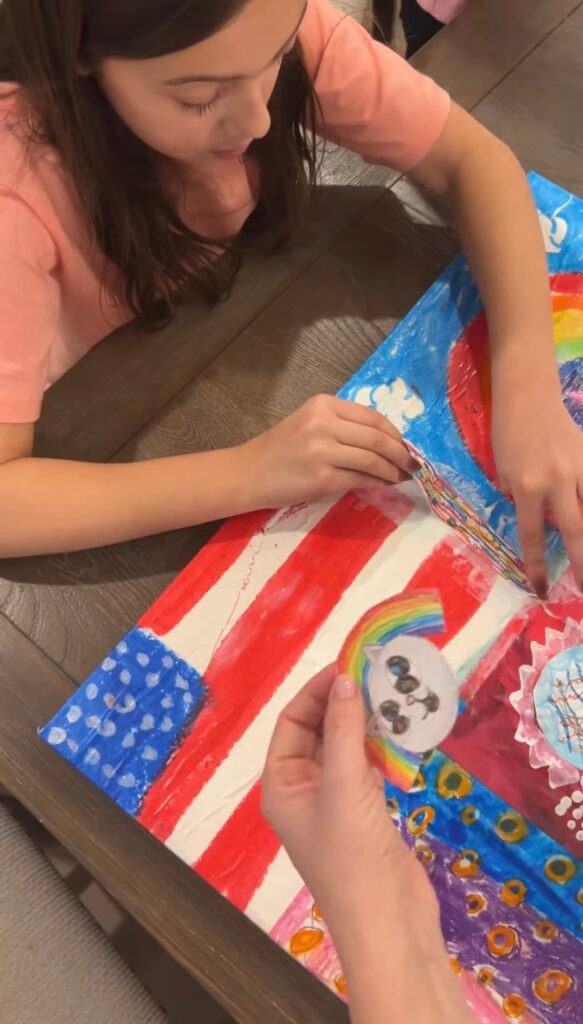
Once the entire canvas was covered and fully dry, I moved on to the smaller pieces. The animals. The people. The little objects that made each drawing unique. Before gluing anything down with Mid Podge, I laid them all out first. I shifted things around. I stepped back. I made sure I loved the placement.
This part felt emotional. Because as I was arranging them, all I could think about was how my five year old sat at a table somewhere, completely lost in creating that piece. How those tiny hands made something that could never be recreated. There’s a lot of pressure in cutting heirloom pieces like this. You don’t want to mess it up.
This is where I will strongly recommend investing in really good paper cutting scissors here. Do not use regular scissors. Trust me. You want something sharp and precise. It makes all the difference, especially when every cut feels so permanent.
Once I was happy with the layout, I Mod Podged each piece individually onto the canvas and also sealed in each piece by applying Mod Podge over it. Be careful when applying the Mod Podge. You don’t want to apply too much as this will create waves in the paper. I found that art work on construction paper took well to it but regular paper was not as tough. It only needed a super thin layer to glue it down. I waited for that to dry before I sealed it on. Then I waited 24 full hours for the entire canvas to dry. No rushing this part.
The next day was where the magic really happened.
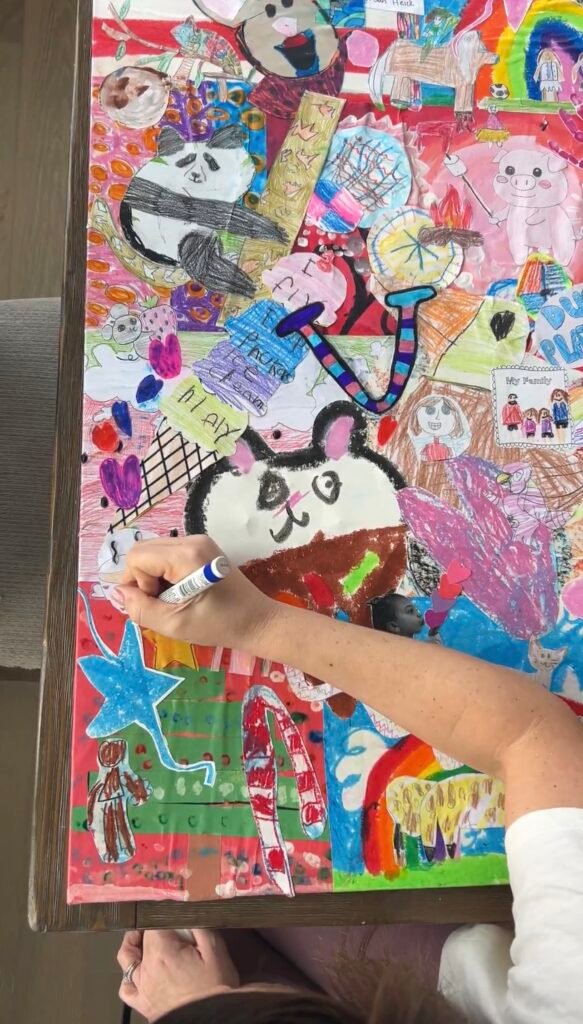
Some pieces blended into the background more than I wanted, so I used acrylic markers here to outline certain objects. Just enough to make them pop again. Then I started adding playful details. Bubbles. Stars. Squiggles. Lines. All in different colors. It added another layer of dimension and movement and somehow made it feel even more like them.
After everything dried, I applied one final layer of Mod Podge over the entire canvas to seal it all in.
At this point, you could absolutely stop here. The canvas alone is stunning. The frame is completely optional.
But I wanted it to feel finished. Like a true heirloom.
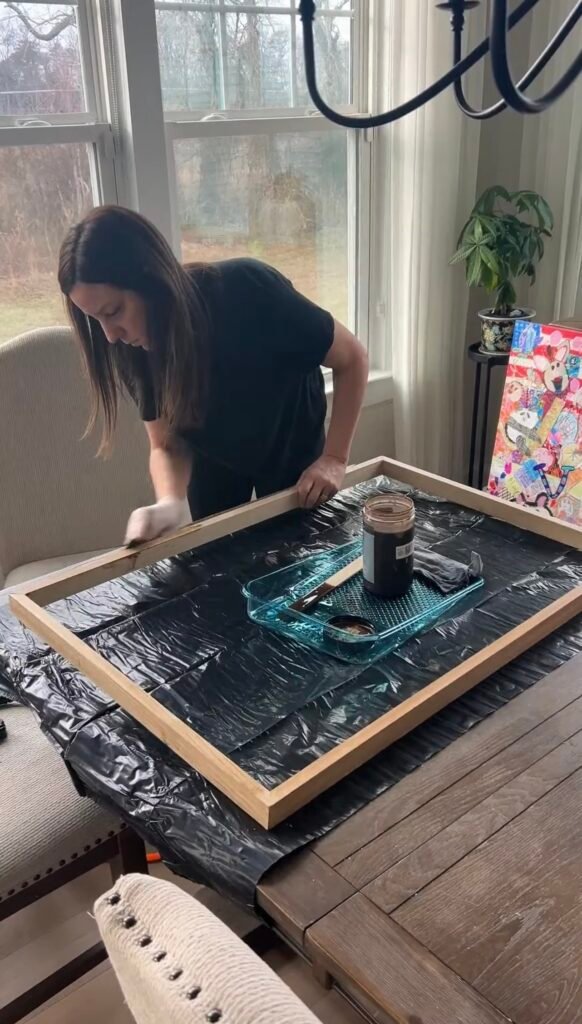
So I picked up 1×2 poplar trim from Home Depot. I cut the pieces to size with 45 degree angles, nailed them together, and stained the frame using the color Early American. Once it dried, I attached it directly to the canvas. Since canvases are already stretched over wood, you can nail right into it. Just be sure to angle your nail gun correctly so nothing pops through the front.
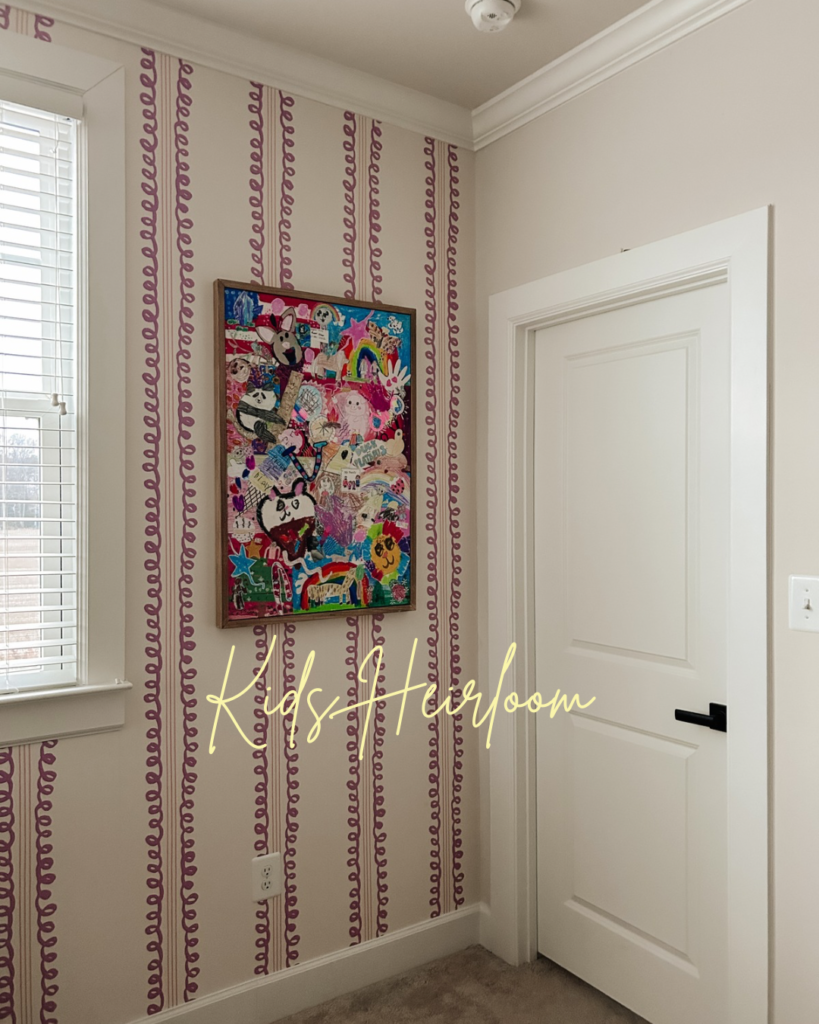
The most meaningful piece of contemporary art you will ever own.
And then I hung it up in our playroom.
You could hang this anywhere. A hallway. A living room. A bedroom. It instantly becomes the most meaningful piece of contemporary art you will ever own. It’s playful. Colorful. Full of life. And it was created by your children.
This isn’t just decor. It’s a story. It’s a memory. It’s proof of tiny hands growing, learning, creating.
It is truly an heirloom.
Supply List
Amazon Storefront links here
- Large canvas, 24 x 36 or any size you prefer
- Children’s artwork
- Mod Podge
- High quality paper cutting scissors
- Acrylic paint markers
- Optional wood trim for frame, poplar or any wood you like
- Nail gun
- Wood stain if framing
This project started as an attempt to organize a closet. And it ended with one of the most meaningful things I’ve ever made for our home. A way to honor the years that go by too fast. A way to stop hiding the memories and start celebrating them.
If you have bins of artwork tucked away somewhere, consider this your sign. Don’t wait another twenty years. Turn it into something you can see and love every single day.
See the transformation here!
Disclosure: This post may contain affiliate links, meaning I get a commission if you decide to make a purchase through my links, at no extra cost to you